Believe me, cleaning the Masterbuilt 560 is easier and quicker than you might imagine.
If that’s what you’re here for, you’ve landed in the right spot..
Choosing the right cleaning tool is crucial. For instance, using a wire brush might leave behind bristles in the smoker, posing a risk if they end up in your food. Moreover, neglecting regular cleaning can lead to flare-ups when cooking at high temperatures.
I’ll admit, initially, I struggled with understanding how to handle the hopper safely during cleaning. The last thing I wanted was to damage my prized smoker. That’s when I delved deep into research.
The good news? You don’t have to go through the same lengthy process. I’ve distilled all my findings into a straightforward guide. Whether you have the Masterbuilt Gravity Series 560, 800, or 1050, I’ve got you covered.
Join me as we dive into the 7-step process to thoroughly clean your Masterbuilt Gravity Smoker..
Dive in…;
Improved Recommended Reading:
If you’re diving deeper into the world of Masterbuilt, I’ve got some personal suggestions for you:–Masterbuilt 560 Modifications: Dive deep into customizing your grill with my detailed guide.
–Masterbuilt 1050 Modifications: Discover 10 effective tweaks and tips in my comprehensive review.
–Masterbuilt 800 Modification: Learn how to optimize your grilling experience with my insights.
–Masterbuilt 560 vs 800 vs 1050: Make an informed decision with my detailed comparison.
–Char Griller 980 vs Masterbuilt 1050: Explore other options and see how they stack up in my unbiased comparison.
How do you clean a Masterbuilt Gravity Series?
Step-by-Step Guide:
- Preparation: Start by opening the lid. Remove the grates, warming racks, and the manifold. (A quick note: the manifold is positioned beneath the cooking chamber. Its role? To let the heat from the charcoal chamber rise into the cooking chamber.)
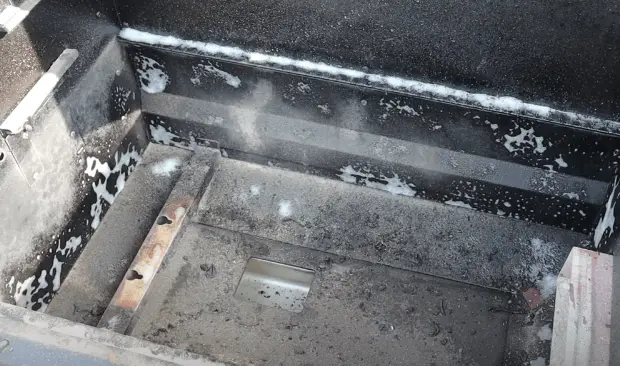
- Degreasing: Generously spray the Pit Boss Degreaser inside the cooking chamber.
- Patience Pays: Let the degreaser sit for a while, allowing it to penetrate and break down the thick layer of oil..
- Scraping: After waiting for a few minutes, gently scrape off the residue using a plastic putty knife or scraper. This ensures the chamber’s metal remains unscathed.
- Vacuuming: Use a vacuum to efficiently remove all the loosened dirt and debris.
- Brushing: Brush every nook and cranny inside the chamber to dislodge any stubborn grease. Remember, avoid using a wire brush to prevent scratches.
- Rinsing: Spray water inside, ensuring all the grime flows out through the oil catcher hole. (This hole, located at the chamber’s bottom, is designed to drain out oil and residue.)
- Drying: Finish by wiping the inside of the cooking chamber with a clean towel, ensuring it’s completely dry.
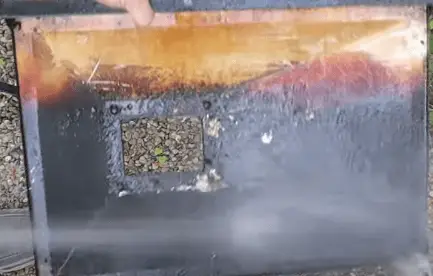
#1 Cooking Chamber Cleaning
Before cleaning your cooking chamber, you have to empty the cooking chamber..
Essentials You’ll Need:
- Pit Boss Degreaser
- Plastic Putty Knife (to protect the chamber’s metal)
- Grill Brush (preferably not a wire brush to avoid scratches)
- Clean Towel
Step-by-Step Guide:
- Preparation: Open your lid and remove grates, warming racks, and manifold from the smoker.
(Manifold stays underneath the cooking chamber.
When the heat comes from the charcoal chamber, the manifold allows that heat to rise into the cooking chamber.)
- Applying Degreaser: Spray degreaser all inside the cooking chamber.
- Wait for some time: Allow the thick layer of oil to absorb the degreaser for some time.
- Scrapping: After a few minutes, scrape with a spackle knife, or you can use a scraper.
(It would be better if you use a plastic scraper so that the chamber’s metal is not damaged by rubbing.) - Collect Grease: Use a vacuum to catch all dirty stuff and dust.
- Brush inside: Now brush every part of the inside of the chamber so that the sticky grease comes out. (Try to avoid wire brush)
- Wash with Water: Spray water and let the oily, dirty water and messy things out through the oil catcher hole.
(Oil catcher hole is at the bottom of the cooking chamber, which takes the oil and all the dirty things out of the hole.) - Wipe and Dry: Wipe inside the cooking chamber with a clean towel to dry completely.
#2 Cooking Grates Cleaning
Cleaning the grates is a task I’ve always found straightforward, especially with a good degreaser. However, if you’re not keen on using a degreaser, warm soapy water works wonders too.
Here’s What You’ll Need:
- Degreaser (or warm soapy water as an alternative)
- Grill Brush
- Clean Towel
My Step-by-Step Guide:
- Degreasing: Start by spraying the degreaser on both sides of the grates. Ensure you cover the warming racks too. This helps in breaking down the stubborn grease.
- Let it Sit: Patience is key. Allow the degreaser some time to work its magic and soften the grease.
- Brushing: Once you notice the grease softening, take your grill brush and scrub both sides of the grates thoroughly. If some spots remain, don’t hesitate to spray a bit more degreaser.
- Rinsing and Drying: After brushing, rinse the grates with water to wash away the residue. Finally, dry them thoroughly with a clean towel.
- A Quick Tip: Did you know that using a kitchen degreaser can alter the indoor aerosol composition for days? It’s fascinating how long its effects can linger!
Did you know?
Single Usage of a Kitchen Degreaser Can Alter Indoor Aerosol Composition for Days.
Yes it can stay there for days..!
How to clean cooking grates without degreaser?
Cleaning cooking grates doesn’t always require a degreaser. In my experience, warm soapy water can be just as effective.. And if you’re not a fan of soap, apple cider or vinegar is a great alternative..
Here’s What You’ll Need:
- Hand gloves (to protect your hands)
- A bowl (for mixing)
- A brush (for scrubbing)
- A small towel (for wiping)
My Step-by-Step Guide:
- Preheat: Begin by setting your smoker’s temperature to 500 degrees. This helps in loosening up the grease.
- Brushing: With your grill brush, scrub off any residue on the grates inside the chamber.
- Prepare the Cleaning Solution: In a bowl or container, mix warm water with a soap of your choice. If you’re opting for a natural cleaner, add one or two small cups of apple cider or vinegar to the warm water.
- Towel Cleaning: Dip a small towel into the cleaning solution. Squeeze out the excess water.
- Scrubbing: Using tongs (to avoid burns), hold the damp towel and scrub around the grates. This method helps in removing stubborn grease and residue.
- Repeat: Continue the scrubbing process until the grates are spotless.
- Drying: Once cleaned, either let the grates air dry or wipe them down with a clean, dry towel.
If you give this method a shot and it works wonders for you, I’d love to hear your feedback..!
#3 Ash box (including Hopper) Cleaning
Before diving into cleaning the ash box and hopper, there are essential things I’ve learned that you should be aware of:
Pre-Cleaning Considerations:
- Grill Temperature: Ensure the grill, including all its parts, is completely cooled down.
- Safety First: Always disconnect the electric wire from the main power. It’s crucial to protect the electric components, especially the fan, from water. I recommend covering the electric wire with cello tape or a similar protective material.
- Cleaning Materials: A clean, soft cloth is your best friend here. And always wear gloves for added safety..
Here’s My Step-by-Step Guide:
- Empty the Hopper: Before anything else, make sure the hopper is devoid of any contents.
- Charcoal Tray: Gently shake the charcoal tray from the hopper. This ensures any small charcoal pieces or ash trapped in the tray fall into the box. Once done, remove the tray, clean off any dust, and place it back.
- Ash Bin Cleaning: Remove the ash pan, discarding any ash and leftover charcoal. A simple wipe with a dry cloth should suffice for the ash bin.
- Dust Removal: Use a vacuum to thoroughly clean the ash chamber. Pay special attention to the door and its gasket.
- Hopper Cleaning: In my experience, it’s best to avoid using water or any liquid cleaners for the hopper and its bottom. Simply vacuum any dust and give it a good wipe with a dry cloth.
Remember, the key is to be gentle and thorough. And if you follow these steps, your ash box and hopper will be in top-notch condition!
The hopper and its bottom, in my opinion, should not be washed with water or any other cleaning..
You vacuum up the dust and wipe it off with a dry cloth, that’s it…
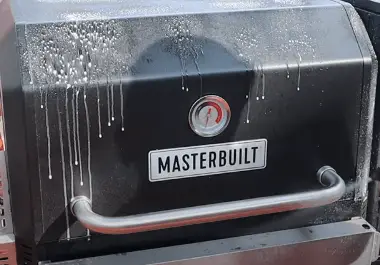
#4 Exterior Cleaning
Before we jump into the interior, let’s give the exterior of the grill the attention it deserves. Trust me, a clean exterior not only looks good but also extends the life of your grill..
Here’s What You’ll Need:
- Weber Exterior Grill Cleaner.
- A paper towel or a clean, soft cloth.
My Step-by-Step Guide:
- Preparation: Before anything else, ensure the grill’s lid is securely closed.
- Spray Cleaner: Generously spray the Weber Exterior Grill Cleaner over the grill’s exterior. A word of caution: avoid spraying the hopper and controller to prevent any potential damage.
- Wiping: Using a paper towel or a soft cloth, gently wipe down the exterior to remove any dirt or residue.
- Rinsing: Give the grill a gentle spray with water to wash away any leftover cleaner.
- Drying: Finish off by thoroughly drying the exterior with a clean towel. This step is crucial to prevent any potential rusting.
By following these steps, you’ll have a grill that not only works great but looks the part too..!
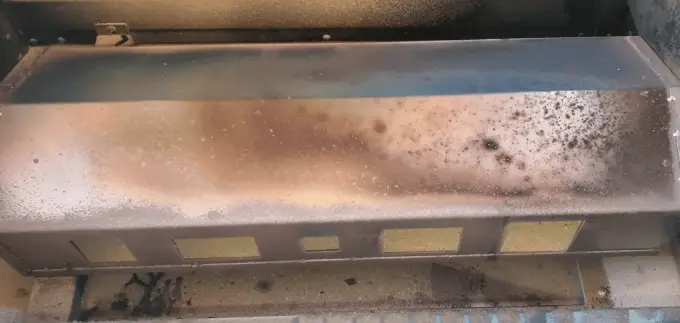
#5 Manifold Cleaning
Cleaning the manifold can be a breeze if you follow some of my tried-and-true tips. One of my go-to strategies is to spray the degreaser right after removing the manifold from the chamber.
This simple step can save you a lot of time and effort.
Another trick I swear by is preventing the manifold from getting too dirty in the first place.
How? I place a drip pan on top of the manifold and cover it with foil. This way, both the manifold and the drip pan stay clean, making my cleaning routine much smoother.
Here’s What You’ll Need:
My Step-by-Step Guide:
- Dump the Mess: Start by removing any large debris or residue from the manifold.
- Spray Cleaner: Generously apply the Weber Exterior Grill Cleaner over the manifold.
- Let it Sit: Give the cleaner a minute or so to work its magic.
- Scraping: With your scraper or steel wool, gently scrub the manifold. If you find any stubborn spots, don’t hesitate to apply a bit more degreaser.
- Rinsing and Drying: Once you’re satisfied, rinse the manifold with water and let it air dry.
By following these steps, you’ll ensure your manifold stays in top condition, ready for your next grilling session!
#6 Oil Catcher Cleaning
Honestly, cleaning the oil catcher isn’t my favorite task. But over time, I’ve found a way to make it less tedious. My secret? The Weber Exterior Grill Cleaner. It’s a game-changer, making the process straightforward and efficient.
Here’s What You’ll Need:
My Step-by-Step Guide:
- Preparation: Begin by gently pulling out the oil catcher and placing it on a flat surface.
- Spray Cleaner: Generously apply the Weber Exterior Grill Cleaner over the oil catcher pan.
- Let it Work: Allow the cleaner a few minutes to break down the grease and residue.
- Scrubbing: With your steel wool or scraper, give the oil catcher a thorough scrub. Ensure you cover all areas to get rid of any stubborn spots.
- Rinsing: Once you’re satisfied, rinse the oil catcher with water to wash away any leftover cleaner.
- Drying: Ideally, let the oil catcher air dry in the sunlight. If you’re in a hurry, a quick wipe with a dry cloth will do the trick.
By following these steps, you’ll have an oil catcher that’s clean and ready for your next grilling adventure!
#7 Stainless Portion Cleaning (side table, controller, handle)
For the stainless portions of the grill, I’ve found that a dedicated stainless steel cleaner does wonders. It not only cleans but also gives that shiny, polished look we all love..
Here’s What You’ll Need:
My Step-by-Step Guide:
- Spraying: Begin by applying the Weiman Stainless Steel Cleaner generously over the controller, side table, and handle.
- Wipe Down: After letting the cleaner sit for a minute, use a paper towel to wipe down the stainless portions. This will remove any residue and bring out the shine.
- Drying: To ensure there are no streaks or spots, give it a final wipe with a dry towel. And there you have it! Your grill’s stainless portions will look as good as new.
Once you’ve ensured all the parts are dry, it’s time to reassemble your grill. Make sure each component goes back to its rightful place..
List of Tools and Accessories Used:
Cleaning Agents & Solutions:
- Weber Exterior Grill Cleaner
- Weiman Stainless Steel Cleaner
- Degreaser (including Pitboss Degreaser)
- Zep Grill and Oven Cleaner
Tools & Utensils:
Grill Components & Accessories:
- Masterbuilt 560 Grates
- Smoking Mat, 30 inch, Black
- Grease Tray
- Masterbuilt Series 560 Cover
- Masterbuilt Series 1050 Cover
- Meat Probe
- Mat, Gloves & Rib Rack
- Rotisserie Kit
Additional Resources:
Having the right tools and accessories on hand not only makes the cleaning process smoother but also ensures you get the best results. If you have any other items or products you’d like to add or discuss, please let me know!
FAQ Section
# How long does Masterbuilt 560 last?
The Masterbuilt 560 is designed to last up to 12-15 hours on a 16-pound bag of briquettes or 10 pounds of lump charcoal. However, the actual duration can vary based on usage and other factors.
# How long does it take for the charcoal chute to cool after use?
Typically, a charcoal chute takes about 2 to 3 hours to cool down after use. It’s always best to wait and ensure it’s completely cool before handling.
# How often should I clean my Masterbuilt 560?
I recommend cleaning your Masterbuilt 560 once every month or two to maintain its performance and longevity..
# Do you clean smoker racks?
Absolutely! I make it a point to clean my smoker racks after almost every cook. It’s not only safe but also ensures better tasting food.
# What’s the best way to keep my manifold clean?
The most effective method I’ve found is to cover the manifold with foil or use a drip pan. This catches any drippings from the grate, keeping the manifold clean.
# How can I prevent the gasket from sticking?
To avoid the hopper gasket from sticking, simply place a piece of foil between the gasket and the lid.
# Is the Masterbuilt 560 easy to clean?
Yes, cleaning the Masterbuilt 560 is relatively straightforward, especially when compared to other smokers. The process is quite similar to cleaning a standard gas grill.
# What are the dimensions of the primary grate for the Masterbuilt 800 series?
The primary grate measures 23.5″ x 16″, while the accompanying warming racks are 24″ x 8.75″.
# Does my smoker need seasoning?
Definitely! It’s essential to season your smoker before its first use to eliminate any residues or contaminants. For optimal smoking results, I even suggest seasoning the smoker before each use.
# Conclusion
In conclusion, for the best performance and longevity, Masterbuilt Gravity Series smokers (560, 800, and 1050) must be properly cleaned and maintained.
Cleaning the grates, ashtray, and interior of the smoker on a regular basis helps avoid accumulation, guarantees proper ventilation, and lowers the possibility of flare-ups.
You can enjoy consistent and savoury results while extending the life of your Masterbuilt Gravity smoker by following to these cleaning instructions..