
Welcome to my fellow foodies! I’m excited to explore the fun world of grilling with you.
In this article, “Grilling Basics for Beginners” we’ll uncover the secrets to turning common foods into delicious dishes over an open flame.
I will help, whether you’re new to grilling or just want to review the basics.
Let’s have an amazing trip together and learn how to cook outdoors!
- Grilling Basics for Beginners
- # Choosing the Right Grill
- # Essential Grilling Equipment
- # Getting the Grill Ready
- # Safety Measures
- # Igniting the Fire
- # Direct vs. Indirect Grilling
- # Marinating and Seasoning
- # Cooking Times and Temperatures
- # Checking Doneness
- # Avoiding Flare-Ups
- # Resting the Meat
- # Cleaning Up
- # User Queries and Value
Recommended Reading:
– Gas Grilling vs Charcoal Grilling: A clear comparison. It helped me choose the right grill. Ideal for beginners.
– Grilling Temperature Guide: Learn about perfect temperatures. It’s essential for perfect cooking.
– Outdoor Cooking Accessories: Discover useful outdoor cooking accessories. They make grilling easier and more fun..
Grilling Basics for Beginners
# Choosing the Right Grill
Here are the three different types of grills, such as gas, charcoal, and electric.
Gas Grill
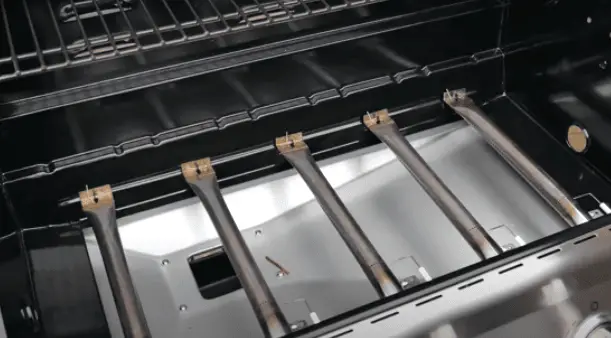
Gas grill basically comes with a tank it means Gas grill is run by gas fuel. It is safe and easy to use. Beginners will find it very easy to light it. Gas grills are available in different sizes with different features. It is very beneficial for outdoor cooking. Let us know about their good and bad qualities.
How to use it?
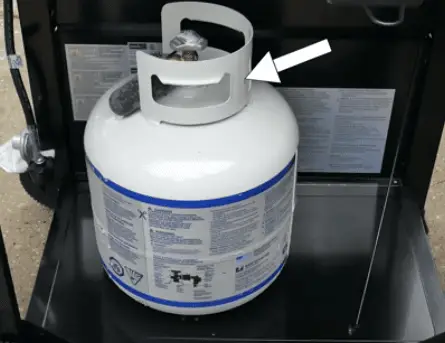
- Prepare the Grill: Make sure your gas tank is full and that the connections are tight. You can use soapy water to check for gas leaks.
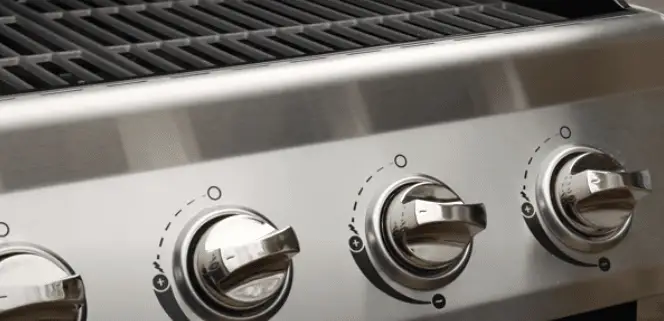
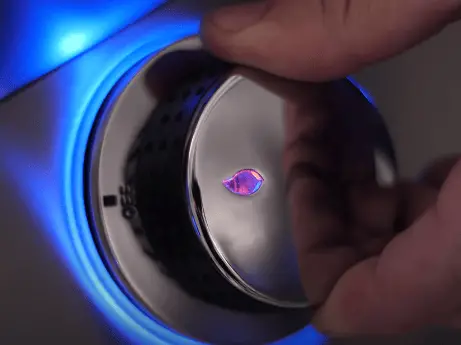
- Ignite: Turn the gas on using the control knob, and then light the burners with the lighter or ignition button.
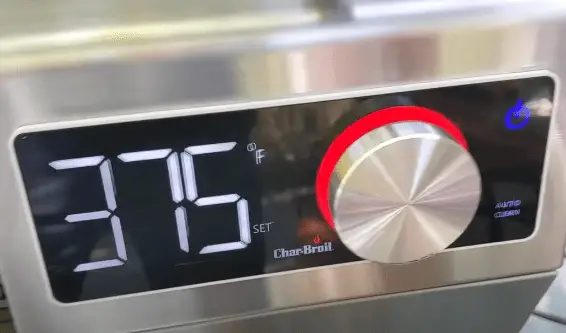
- Preheat the grill: The grill should be preheated, with the lid closed, for about 10-15 minutes.
- Control Temperature: To get the desired temperature, adjust the burner knobs.
- Cooking: Place the food on the grill and cook according to your recipe. You have to turn the food as needed.
- Monitor the process: Monitor the cooking process and adjust the temperature as needed.
- Safety: Turn off the gas and burners after cooking, then allow the grill to cool before cleaning.
Pros
- After preheating your grill, you can start grilling.
- Easy to control the temperature.
- Produce clean burn
- Less flaming and smoke.
- Come with various burners.
- No fear of high or low heat.
- Easy to start and adjust.
- Heat up quickly.
Cons
- Less portable since of its tank.
- A consistent supply of gas is required.
Example of best gas grill
2. Weber Genesis 325S Liquid Propane
3. Char-Broil 463371719 TRU Infrared Stainless
4. Weber 2 Burner Propane Grill
5. Monument Grills Stainless Propane Burners
6. Weber 49010001 Spirit Black Outdoor
Charcoal Grill
A charcoal grill cooks meals using charcoal as the main fuel source. This is the best option if you want to experiment with traditional grilling. This grilling method is popular all over the world. Because it gives a unique smoky flavor to cooked food.
Charcoal grill comes with a cooking grate, ash catcher, charcoal chamber, lid, ventilation system, wheels or legs.
How to use it?
- Choose a safe, well-ventilated outdoor location and sturdy surface to set up the grill.
- Light the charcoal briquettes or lump charcoal in the chimney.
- When the coals start turning into ashes, then spread the charcoal in the chamber. This process takes only 10 minutes.
- Adjust the water pan and vents for constant temperature and moisture.
- Close the lid.
- Use a thermometer to check temperature.
- Add coal and wood if needed.
Pros
- Provide distinct smoky flavor.
- Capable of high temperatures.
- Affordable.
Cons
- For novices, temperature control might be difficult.
- Ash removal and cleaning demand further care.
Example of best gas grill
2. Weber Performer Deluxe Charcoal Grill
3. Char Griller E06614 AKORN Charcoal kamado
Recommended Reading:
– Best charcoal smoker
– Charcoal Gravity Smoker
Electric Grill
An electric grill uses electricity as its primary heat source to cook food. It provides an efficient and indoor-friendly grilling solution. This is the ideal option if you don’t want the flavor of charcoal, propane, or an open flame.
The main electric grill is made up of a base, a cooking grate or griddle, a power cord, a heating element, and a lid that covers it.
How to use it?
- Set up the electric grill close to an outlet on a level, secure surface.
- Preheat the grill to the proper cooking temperature.
- Place the food on the cooking surface.
- Close the lid.
- Use the temperature control knob to maintain the cooking temperature and adjust as needed.
- Once you’re finished cooking, turn off the grill and unplug it.
- Give it time to cool.
- Remove food and keep clean as before.
Pros
- Easy to use.
- Reduce preheating time.
- Electric grill suitable for use indoors or in places where open flames are not allowed.
- Electric grills quickly become warmer.
- Generate less smoke.
Cons
- Possibility of Power Outages.
Example of best Electric gas grill
2. Char Broil 22652143 Electric Grill Stainless
3. George Foreman, Silver, 12+ Servings Upto 15 Indoor/Outdoor Electric Grill
6. Cuisinart GR 5B Electric griddler
7. Kenyon Floridian Portable Stainless
8. Char Broil 20602107 Bistro TRU Infrared Electric
Recommended Reading:
– Best electric grill for Beginners.
# Essential Grilling Equipment
Here are some important tools like-
Tongs : Tongs are used to safely turn and flip food on the grill.
Grill brush : Grill brush provides a clean cooking surface by removing debris.
Food thermometers : Food thermometer guarantees appropriate doneness.
Basting Brush : With a basting brush you can apply marinades and sauces.
Grill Gloves : Grill gloves shield the hands from heat and dripping grease.
Chimney starter : Chimney starter helps to ignite charcoal.
Grilling Baskets / Grilling Bags / Folding Grilling baskets : The basket grill holds small or delicate items so they don’t fall through the mesh.
Skewers : For kebabs and vegetables, skewers are ideal.
Grill Grate : Grill grate is very useful for grilling. You can adjust and move the grill grate.
Smoker Box : If you are grilling in a gas grill and want more smokey flavor, then definitely take advantage of the smoker box.
# Getting the Grill Ready
Step 1: Cleaning the Grill Grates
- Let cool the grill.
- Remove any leftover ash.
- If you want you can remove the grates and drip tray of the grill.
- Scrub the grates thoroughly with a grill brush.
- The grates should be cleaned with a moist cloth to get rid of any leftover debris and soapy water(optional).
- Dry thoroughly.
Step 2: Cleaning the Interior
- Scrap the interior with a brush or scraper.
- Wipe down the inside surfaces with a damp cloth or degreaser or soapy water to clean the interior area..
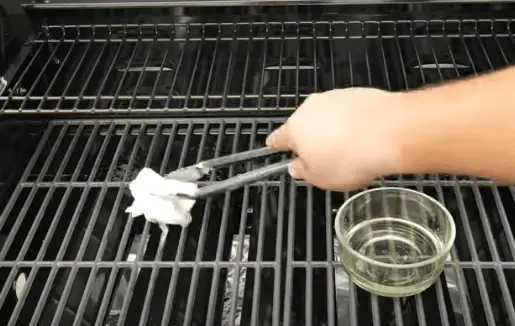
Step 3: Seasoning the Grill Grates
- After cleaning, heat the grill on high heat for 15 to 20 minutes.
- While the grill is hot, use paper towels or a brush to apply a thin layer of cooking oil to the grate.
- Allow the oil to heat up and smoke for a few minutes so that the grates become shiny and well coated.
- Turn off the grill and let it cool down.
- Wipe off any excess oil using a clean cloth or paper towel.
Step 4: Cleaning and Seasoning Routine
- Brush the grates while they are still hot after each use to get rid of excess food debris.
- Follow the methods described above to deep clean the appliance after a few uses.
- Regular seasoning improves the flavor and prevents the food from sticking.
Pro Tips:
- Use a grill cleaner or a solution of baking soda and water to remove difficult dirt.
- Since soap leaves a residue and can affect the taste of your food, we shouldn’t use it on grates.
- Regular application of seasoning aids in the development of a natural non-stick surface.
# Safety Measures
- Proper placement: Place the grill on a sturdy, level surface away from flammable items.
- Ventilation: For proper airflow, grill in an area with ventilation.
- Fire extinguisher: For emergencies, keep a fire extinguisher, water source or sand nearby.
- Wear the right outfit: Use heat-resistant gloves, an apron, and closed-toe shoes to protect yourself from fire and splashes of hot oil.
- Tool safety: To handle food safely and avoid splatters of hot oil and getting too close to the heat, use tools with long handles.
- Cleanliness: To reduce the risk of fire, remove accumulated grease and debris regularly.
- Maintain distance: To prevent burns or mishaps, keep a safe distance away from the grill while it’s in use.
- Children and Pets: Keep children and pets at a safe distance from the hot grill.
- The oversight: A lit grill should never be left unattended, and it should always be turned off entirely after use.
- Grill cover: When not in use, cover the barbecue with a grill cover to keep it dry and protected from the elements.
# Igniting the Fire
Instructions on how to safely light an electric, gas or charcoal barbecue.
For Charcoal Grills:
- Prepare the Charcoal: Arrange charcoal on the charcoal grate or you can use a chimney starter.
- Light the charcoal: Use a fire starter or paper to light charcoal.
- Let burn the charcoal: Let the coals burn for 20 to 30 minutes, or until a layer of white ash forms on top.
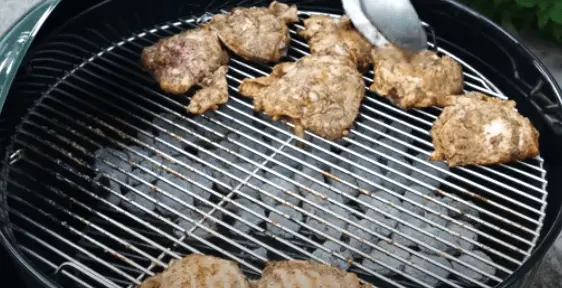
- Place the coals: Use tongs to evenly distribute hot coals for indirect or direct cooking.
For Gas Grills:
- Open lid: Before turning on the gas, you must first open the lid of the grill to prevent gas accumulation.
- Turn on gas: Open the valve on the propane tank or natural gas line and start the gas flow.
- Ignite the burners: Use a long lighter or the built-in igniter to light the burners. Observe the directions provided by the grill’s maker.
- Preheat the grill: As soon as the grill reaches the correct cooking temperature, close the cover and let it heat for 10 to 15 minutes.

For Electric Grills:
- Plug in: First, plug the electric grill securely into a grounded outlet.
- Preheat: Set the grill’s temperature dial to the preferred setting, then wait a few minutes for it to heat up.
- Grilling surface: To prevent sticking, lightly coat the grilling surface with oil or non-stick spray.
- Place the food: Now arrange your food on the preheated grill.
- Close the lid: To maintain heat and cook your food evenly, close the lid of the grill.
- Cooking time: Observe the suggested cooking time and temperature for your recipe.
Safety Tips:
- Place the grill far from combustible materials on a firm, flat surface.
- Keep pets and children in a safe area away from the grill.
- When working with the grill lid or other hot surfaces, wear gloves that will resist heat.
- After each usage, disconnect the electric grill and let it cool before cleaning.
# Direct vs. Indirect Grilling
Direct grilling methods
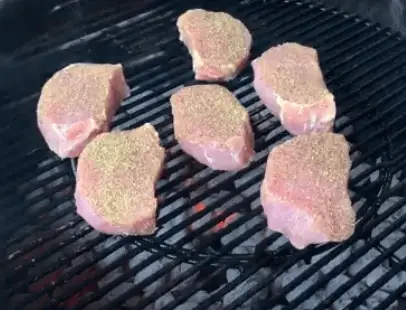
In the direct grilling technique, the food is positioned directly over the heat source and rotated halfway through the cooking process to allow both sides to cook.
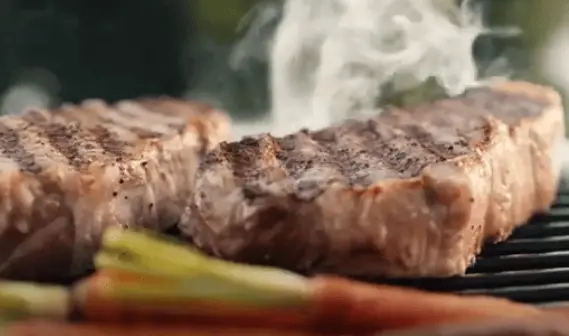
The direct grilling method is used mostly to sear food and to cook food in less than 20 minutes.
This method is ideal for directly grilling vegetables, steaks, chops, kebabs, sausages, burgers, shrimp and many other items.
You can use any type of grill for direct grilling, although it performs best when the grill lid is kept closed while cooking.
Indirect grilling methods
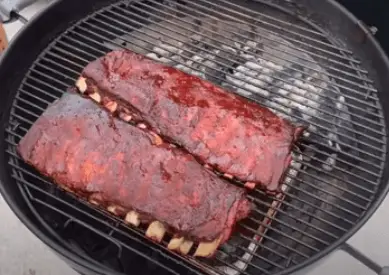
Indirect grilling method is used for large pieces of meat and other foods. This method requires long cooking at low temperatures.
In the indirect heat method, you close the lid of the grill and cook the food away from the heat source.
You can add wood chips to indirect smoking for smoky flavor.
Additionally, the rotisserie can be used for self-basting and even cooking. Good for roasting and whole birds.
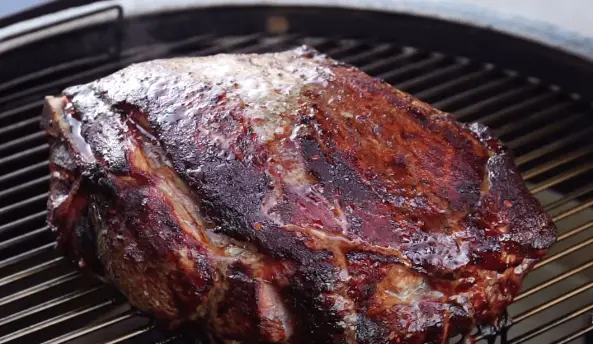
This method is used to prepare ribs, pork shoulders, briskets, whole chickens, whole turkeys, and other significant dishes.
Tips for Direct and Indirect grilling
Direct Grilling:
- Quick Cooking: Direct grilling is perfect for swiftly cooking meals like steaks, burgers, and seafood.
- High Heat: Heat the grill to a high temperature in order to sear food and produce grill marks.
- Flip the food: Frequent turning is essential for even cooking and to avoid scorching.
- Thinner slices: For smaller foods and thinner meat slices, direct grilling is best.
- Marinate or Season: Before grilling the dish, season or marinate it for better taste.
Indirect Grilling:
- Low and Slow: Use indirect grilling for foods that take longer to cook or larger pieces of meat.
- Even Cooking: This process prevents contact with direct flame, ensuring consistent cooking.
- Two-Zone Setup: This method allows for two-zone grilling so that on one side you can place the food and on the other side will be the source of heat.
- Thicker Cuts: Indirect grilling works nicely thicker cuts.
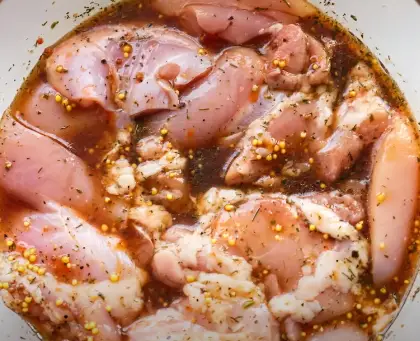
# Marinating and Seasoning
Here are essential tips for Marinating and Seasoning to create mouthwatering results..
- Pick Flavorful Marinades: To make a well-rounded and delectable marinade, use a combination of citrus juice or vinegar, oils, and herbs or spices.
- Marinating Time: Marinate from 30 minutes to several hours, depending on the protein. Avoid over marinating as it can turn the meat into mush.
- Use sealed bags: Use resealable plastic bags or containers to seal meats and marinades to ensure even distribution and reduce mess.
- Effectively coat: Massage the meat to help the marinade absorb evenly and enhance the flavor and tenderness.
- Safety in refrigerator: After marinating, the meat should be kept in the refrigerator to prevent bacteria from growing.
- Balance salt: Using too much salt can dry out the meat, so be careful when marinating.
- Explore and learn: To develop your personal marinades, experiment with the ingredients and ratios.
- Before grilling dry: Dry the marinated meat well for better browning before putting it on the grill. Marinade should not drip.
- Avoid high acidity: High-acid marinades may ruin meat if stored in the refrigerator for an extended period of time. Use them, especially when employing sensitive proteins, for shorter marinating times.
- Refrain from Cross-Contamination: If marinade has come in contact with raw meat, do not use it again. You can use it as a sauce but you have to boil it first.
# Cooking Times and Temperatures
| Type of Food | Desired Doneness | Internal Temperature (°F) | Cooking Time (per side) |
| Beef | Medium-Rare | 130-135 | 3-4 min |
| Beef | Medium | 140-145 | 4-5 min |
| Beef | Well-Done | 160 and above | 5-6 min |
| Poultry | Chicken Breast | 165 | 6-8 min |
| Poultry | Chicken Thigh | 170 | 7-9 min |
| Poultry | Turkey Breast | 165 | 20-25 min |
| Pork | Medium-Rare | 135-140 | 4-5 min |
| Pork | Medium | 145-150 | 5-6 min |
| Pork | Well-Done | 160 and above | 6-7 min |
| Lamb | Rare | 125-130 | 3-4 min |
| Lamb | Medium-Rare | 135-140 | 4-5 min |
| Lamb | Medium | 145-150 | 5-6 min |
| Seafood | Shrimp | 120-130 | 2-3 min |
| Seafood | Fish Fillets | 145 | 3-4 min |
| Seafood | Scallops | 130-140 | 2-3 min |
| Vegetables | Asparagus | N/A | 5-7 min |
| Vegetables | Bell Peppers | N/A | 4-6 min |
| Vegetables | Zucchini | N/A | 3-5 min |
# Checking Doneness
There are a few tools and considerations you can apply to ensure that the meat is cooked properly.
Use a meat thermometer: Using a meat thermometer is an option. Check the desired temperature by inserting it into the thickest portion of the meat without contacting the bone.
Use a fork or skewer: You can use a fork or skewer to pierce the thickest part of the meat. If the juices run clear it means you have reached the desired temperature.
Examine how much the meat shrank: Meat gets smaller as it cooks. So keep checking whether it has shrunk or not.
Temperature Chart: For safe internal temperatures, see also Temperature Chart.
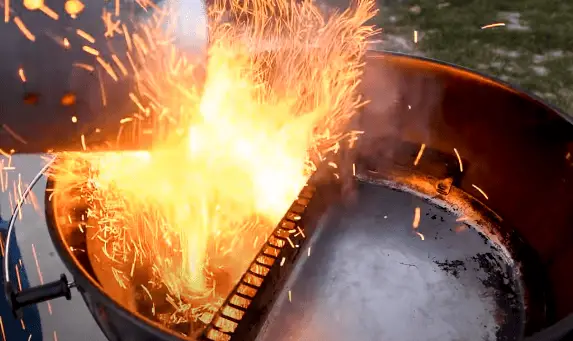
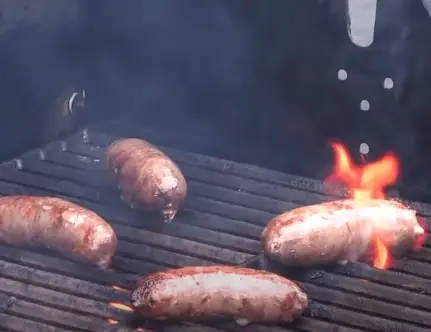
# Avoiding Flare-Ups
- To cut down on extra grease, keep the grill clean.
- Drippings contribute to grill flare-ups, so remove extra fat from meats to reduce drippings.
- In addition to this, you can build up a two-zone fire, putting coals on one side to prevent flare-ups.
- Put on hand gloves and temporarily shift the food to the cooler side if flare-ups happen in the grill.
- Close the lid of your grill. Keep a spray bottle of water close by in case of minor flare-ups.
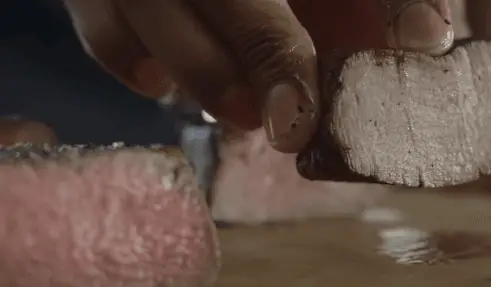
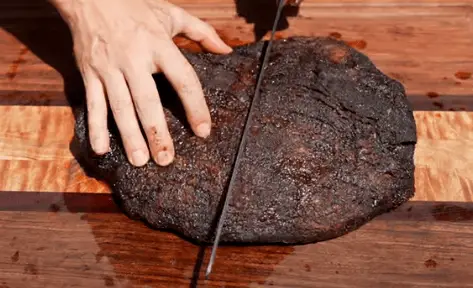
# Resting the Meat
It’s important to let grilled meat rest before serving.Meat becomes more juicy and more flavorful after resting because it allows the juices to be distributed more evenly through the meat.
This little break also lowers the meat’s internal temperature and signals that it is ready for eating.
# Cleaning Up
- After cooking, allow the grill to completely cool.
- Remove the drip pan, grates, etc.
- Use a grill brush to clean off any residue.
- You can use a cleaner to clean grates. Wash thoroughly with water and dry.
- Clean the charcoal grill’s interior of all ash and trash.
- For an electric grill, disconnect the grill from the power socket then repeat the above steps.
- Disconnect the propane tank from gas grills and clean the burners.
- Clean interior surfaces using a damp towel.
Regular cleaning gives a long life to the grill and ensures healthy cooking.
# User Queries and Value
# What can I do to prevent overcooking meat?
To monitor the internal temperature and avoid overcooking, use a meat thermometer.
# What is the ideal method for marinating meat?
For better flavor, marinate in the fridge for a few hours or overnight.
# Can I grill meat and vegetables together?
Yes, of course, you can grill meat and vegetables together. Use foil or a grill basket to keep small vegetables from falling through the mesh.
# How do I stop flare-ups?
Use a two-zone fire configuration to control flare-ups, keep the grill clean, and cut any excess fat from the meat.
# How long should meat rest before cooking?
Let the meat rest for 5 to 10 minutes before serving for juicier and more delectable outcomes.
# Could I also use the marinade as a sauce?
You can use the marinade as a soup, but you will have to boil it. However, due to the potential for cross-contamination, it is not advised to use the same marinade for basting and serving.
# Is it better to grill larger pieces of meat over direct heat?
No. Larger cuts are best grilled indirectly because it promotes even cooking without excessive charring.
# How can I determine if the grill is hot enough?
Approximately 6 inches over the grill, raise your hand. It’s hot enough if you can’t keep your hand there for more than a few seconds.
# What separates gas grills from charcoal grills?
While charcoal grills start slowly and offer smokier flavor, gas grills start quickly and offer accurate temperature control.
Conclusion
In conclusion, keep in mind that practice will make perfect as you dive into the realm of grilling.
With each sizzle and sear, you can explore a new universe of tastes and sensations.
So, light up the grill, enjoy the delicious food that comes out of it.
Cheers and happy barbecuing!