Are you searching for Char-Griller Smokin Pro mods or Char Griller smoker mods? You’re in the right place.
I’ve found that unless we’re dealing with high-end smokers, it’s challenging to get everything just right during smoking.
This is especially true for the Char-Griller Pro.
The Char Griller Smokin Pro can come with its set of challenges, such as:
- Misleading thermometer readings.
- Struggles with maintaining constant smoke.
- Overheating issues in the cooking chamber.
- A noticeable temperature difference across the cooking grates.
- Leakage in the firebox.
- Paint deterioration in the firebox, among others.
- But with the right Char Griller mods, you can elevate your smoking game. I hope my recommendations help enhance your experience.
Hope it helps you in some way…;
- Char Griller Smokin Pro Modifications
- # Problem 1: Incorrect Thermometer Display.
- # Problem 2: Struggling to Maintain Consistent Smoke?
- # Problem 3: Overheating in the Cooking Chamber.
- # Problem 4: Uneven Temperature Across the Cooking Grates.
- # Problem 5: Seal It Up with Gasket Sealant.
- # Problem 6: Firebox Paint Deterioration.
- Frequently Asked Questions (FAQs)
Moreover, I’ve put together a wealth of information to enhance your smoking adventures. Don’t miss out on:
–Top 10 Offset Smoker Modifications
–list of modifications for all types of smokers and grills, including Char Griller mods.
–Char Griller Smokin Pro
–Char Griller Offset Smoker Mods
–Char Griller Competition Pro Mods
–Oklahoma Joe vs Char-Griller
Char Griller Smokin Pro Modifications
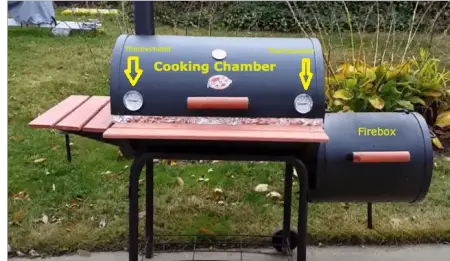
# Problem 1: Incorrect Thermometer Display.
– What is the reason behind it?
Wondering why your Char-Griller Smokin Pro’s thermometer isn’t displaying the correct temperature?
I’ve been there. Often, the thermometer that comes with the smoker isn’t of the best quality. This can lead to confusion when trying to read the temperature.
Moreover, the smoker typically comes with just one thermometer.
It’s clear that relying on a single thermometer can make it challenging to achieve a consistent smoking experience.
This can result in inaccurate temperature readings, potentially ruining your dream of crafting the perfect brisket.
My suggestion? Invest in at least two thermometers to monitor both ends of the cooking grates. It’s a game-changer.
# Modification 1: Getting another Thermometer.
Always opt for a high-quality thermometer. You can find some great options online at reasonable prices. For instance, I recently purchased a meat thermometer that has been working wonders for me. You can check it out [here].
– Material Used:
I recommend the YOTOO Extendable Ratchet Set. It’s versatile, with handles that extend for a longer reach and increased torque. The set includes 1/4″, 3/8″, and 1/2″ drive 72-tooth flex-head quick-release locking ratchets.
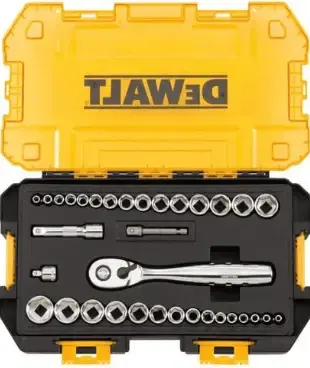
The DEWALT Socket Set is a reliable choice. It comes in a locking, stackable case with a removable inner tray. The set is designed for maneuverability in restricted areas.
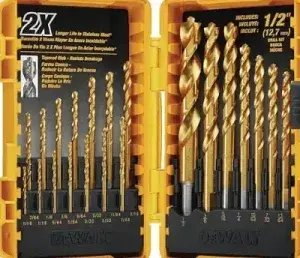
- Drill bit sets (⅜ inches tiny one).
The DEWALT Titanium Nitride Coated Drill Bit Set is a top pick. It offers easy bit removal and a clear lid for easy content viewing..
The BLACK+DECKER 20V MAX* POWERECONNECT Cordless Drill/Driver is compact, lightweight, and versatile. It includes a 30 pc. kit for various drilling and driving tasks.
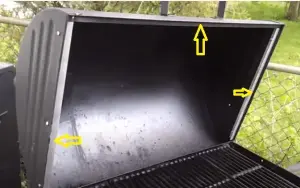
– Steps To Follow:
- Preparation :
- On the cooking chamber door towards the opening edge, mark 5.25 inches upward and 2 inches from the left edge, as shown in the picture.
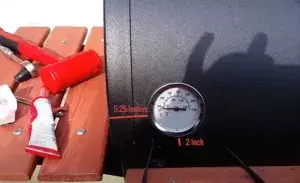
- In the same way, you can do it on the other side.
- Action :
- Now you can drill the three-eighths holes on both sides using the ⅜ tiny drill. Both holes should be at the same level.
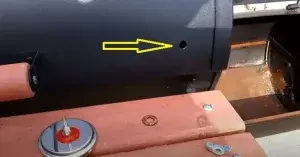
- Now you have to fix the thermometer..
- The thermometer has to be fixed at the lid level where the items are being set for smoking.
# Problem 2: Struggling to Maintain Consistent Smoke?
Ever wondered why it’s challenging to keep a steady stream of smoke for extended periods? I’ve delved into this issue and found some answers.
What is the reason behind it?
Leaks! Yes, those sneaky leakages through the joints and lids can disrupt the flow of smoke. Additionally, not managing the fire properly can also play a part in this inconsistency.
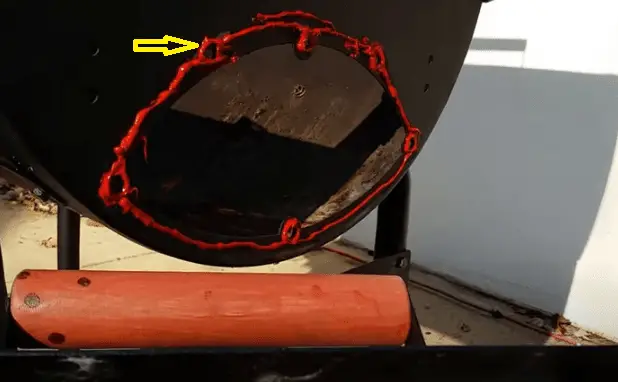
# Modification 2: Sealing the Door and Lid.
Sealing is the key. By ensuring a tight seal, you can significantly improve the consistency of the smoke..
– Materials You’ll Need:
I recommend using the Lava Lock gasket material. It measures 8 inches by ⅝ by 8 feet. The self-stick feature is super convenient, and the best part? It’s rated to withstand temperatures up to a thousand degrees.
– Steps To Follow:
- Preparation :
- Usually, companies use some chemicals in the manufacturing process, so we need to wash everything inside the chamber with soap and water and dry it before using the gasket sealant.
- Action :
Keep a few things in mind.
- How to properly adhere strips to the lip of the cooking chamber.
- Ensuring the gasket covers the entire cooking chamber.
- Apply the gasket to the lid of the Char-Griller Pro.
- Making sure the gasket is securely in place on the lip of the lid.
- Don’t forget the firebox! Apply strips there as well.
- Put the strip all over the lip and the lid of the cooking chamber.
- Stick strips over the firebox.
# Problem 3: Overheating in the Cooking Chamber.
Ever noticed your cooking chamber getting too hot? Let’s dive into why this happens.
What is the reason behind it?
When smoke travels from the firebox through the cooking chamber, the metal plates used for tuning can heat up excessively. This not only makes temperature control challenging but can also cause damage to the smoker’s body over time.
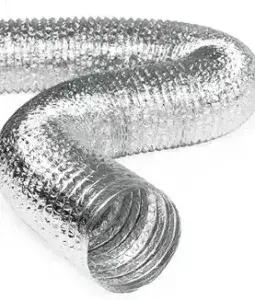
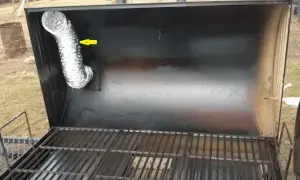
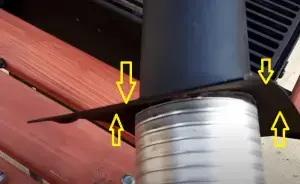
# Modification 3: Introducing the Aluminum Duct Pipe/Dryer Vent Solution
By using an aluminum duct pipe or a dryer vent, you can effectively redirect the smoke, ensuring a more even temperature distribution.
– Material You’ll Need:
- 3-inch aluminum duct pipe or water heater vent.
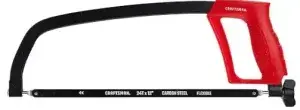
- Hacksaw
- Ratchet sets
- Socket wrench
- Drill sets
- Rutland Clear 500 degrees RTV High Heat Silicone Sealant.
- Silicone Rubber Sheet (12×12-inch by 1/16)

– Steps To Follow:
- Preparation :
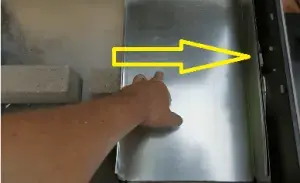
- Clean the exit for the smoke inside the cooking chamber.
- The exit usually is a hole towards the exact opposite side of the firebox.
- It is the pathway for the smoke as it finally exits through the chimney.
- Action :
- Cut about one and a half inches off one end of the duct pipe.
- Attach a rubber sheet to the other end using the silicone sealant.
- Connect the duct pipe to the smoke exit inside the cooking chamber.
- Secure the rubber sheet in place using bolts.
# Problem 4: Uneven Temperature Across the Cooking Grates.
Ever noticed one side of your food cooking faster than the other? Let’s explore why this happens.
What is the reason behind it?
While leakage is a significant factor, the design of the smoker also plays a role in this temperature disparity.
The section of the cooking chamber closer to the firebox naturally gets hotter.
This can lead to a noticeable temperature difference between the two ends of the cooking grates, resulting in uneven cooking.
# Modification 4: Implementing a Baffle Plate and Water Bowls.
Materials You’ll Need:
- Metal sheets (3-foot lengths) from home depot or pre-made baffle plates from Amazon.
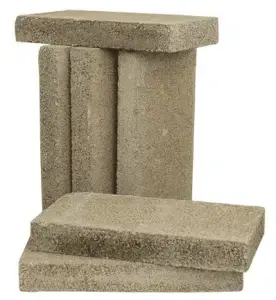
- 3 Fire Bricks
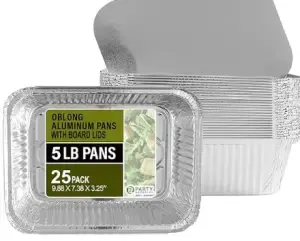
- Aluminum foil bowls (pack of ten)
- Rutland clear 500 degrees RTV High Heat Silicone Sealant.
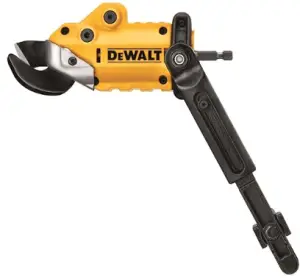
- Metal shears
- You can collect metal sheets( 3-foot lengths) from home depot. Or you can buy readymade baffle plates from Amazon.

- Aluminum foil bowls ten pack

– Steps To Follow:
- Preparation :
- Take out the grates from the cooking chamber.
- Seal the joints inside the cooking chamber and firebox with silicone sealant.
- Incase you are making your own baffle plates with the help of metal shears.
– You need to cut the metal sheet in two pieces. It should be the same size.
– Tilt the metal sheets and bend the side which is to be near the firebox hole. - Get ready with two aluminum bowls with water.
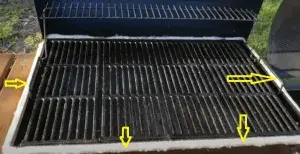
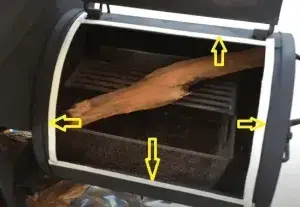
- Action :
- Place the three bricks on the bottom inside the cooking chamber.
- Place the metal sheets on both sides over the bricks as shown in the image.
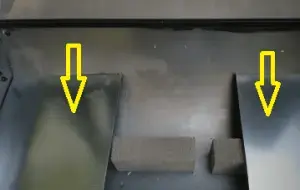
- Place the baffle plates in such a way that it insulates the upper portion of the hole ( Joints between firebox and cooking chamber).
The lower portion will allow smoke to travel towards the cooking chamber. Shown in the image below.
# Problem 5: Seal It Up with Gasket Sealant.
A simple solution to this problem is using a gasket sealant to ensure a tight seal.
What is the reason behind it?
The Char-Griller is designed with relatively thin metal walls, and it doesn’t always come with fully sealed joints.
This can result in both smoke and heat escaping during the smoking process, affecting the overall cooking efficiency..
# Modification 5: Seal It Up with Gasket Sealant.
A simple solution to this problem is using a gasket sealant to ensure a tight seal.
– Material You’ll Need:
– Steps To Follow:
- Preparation :
- Clean the inner and outer surface of the firebox.
Otherwise the gasket may not stick well.
- Action :
- Peel off the Lava Gasket material.
- Put the strip on the door and the lip of the lid.
- Seal every corner and joint inside the firebox with a Heat Silicone sealant.
# Problem 6: Firebox Paint Deterioration.
Noticed the paint on your firebox chipping or looking worn out? Let’s delve into the root cause.
What is the reason behind it?
The primary reason is the intense heat the firebox is subjected to, which can cause the paint to peel and the metal to rust over time.
While shielding it from rain and covering it when not in use can help, the following modification offers a more robust solution.
## Modification 6: Introducing the Charcoal Box Solution.
By using a charcoal box inside, you can protect the firebox from direct heat and prolong its lifespan..
– Material You’ll Need:
- Rust-Oleum High Heat Ultra pa (this paint is only for Barbecue)

– Steps To Follow:
- Preparation :
- Smoothen the rusted area with sand paper.
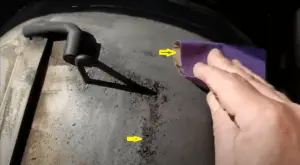
- Wipe all dust and loose paint with a clean rag.
- You must shake the paint can before you open it.
- Shoot somewhere that first initial spray.
- Action :
- Spray over the rusted area.
- Let it dry in the sun.
- Spray the second time after drying in the sun.
- Let it dry again.
- Lastly, cover the firebox.
Frequently Asked Questions (FAQs)
# Do I need to season my charcoal grill?
Absolutely! I recommend seasoning your Char Griller every few months. This not only helps prevent corrosion but also maintains the non-stick seasoned coating, ensuring your food doesn’t stick and the grill lasts longer.
# What are the essential accessories for the Char Griller Smokin Pro?
To enhance your grilling experience and ensure the longevity of your Char Griller Smokin Pro, here are some must-have accessories:
- Cover: Protects your grill from the elements.
- Ash Pan/Drip Pan: Collects ash and grease, making cleanup easier.
- Chimney: Helps in lighting charcoal efficiently.
- High Heat Silicone Sealant: Useful for sealing gaps and preventing smoke leakage.
- Lava Lock Gasket: Ensures a tight seal for the cooking chamber and firebox.
- Fire Bricks: Helps in even heat distribution.
- Aluminum Foil Bowls: Handy for collecting drippings and preventing flare-ups.
- Thermometer Gauge: Essential for monitoring the grill’s temperature.
# Conclusion
In conclusion, these suggested modifications can improve the Char Griller Smokin Pro. The regulation of temperature, heat dispersion, and general performance will all be enhanced by these modifications. You can improve your smoking experience and get mouthwatering, expert-level results by using these mods..