Here I have explained most of your queries about Masterbuilt 1050 Mods…
Check out the modifications…
Incase you are looking for Masterbuilt 560 Mods? Check Here…
- Masterbuilt gravity series 1050 mods
- Mod 1: Masterbuilt 1050 charcoal grate
- Mod 2: Masterbuilt 1050 firebox liner installation
- Mod 3: Masterbuilt 1050 water pan.
- Mod 4: Masterbuilt 1050 vent mods
- Mod 5: Masterbuilt 1050 manifold cover
- Mod 6: Masterbuilt 1050 griddle shroud insert
- Mod 7: Masterbuilt 1050 front shelf
- Mod 8: Masterbuilt 1050 hopper lid mods
- Mod 9: Replacing the Gasket.
- Mod 10: How to fix a gasket on the firebox door?
- Mod 11: How to add Rotisserie?
- Mod 12: Stainless Steel Middle And Upper Grate Mods
- # Masterbuilt Gravity Series1050 Accessories.
- # Fan Troubleshooting for Masterbuilt 1050/560/800:
- FAQs
Recommended Reading :
– 12+ Essential Modifications for Grills and Smokers: Check it out here.
– Master the Masterbuilt Gravity 800 Explore the modifications.
– Optimize Your Masterbuilt Gravity 560 Learn more here.
– Old Country Fed Smoker Mods. Find the mods here.
– Masterbuilt Gravity Series 1050 vs 560 Compare now.
– Ultimate Showdown: Masterbuilt 560 vs. 800 vs. 1050
Masterbuilt gravity series 1050 mods
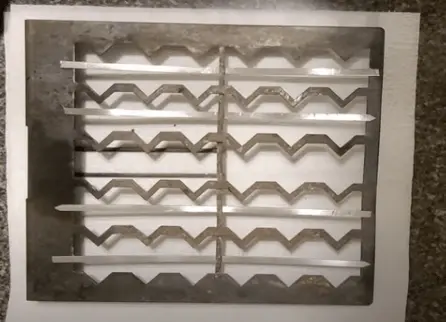
Mod 1: Masterbuilt 1050 charcoal grate
The latest model of Charcoal grate is actually nice..
It comes with fewer gaps and also it has a Fan Protector.
You can check- Charcoal grate with Fan Protector..
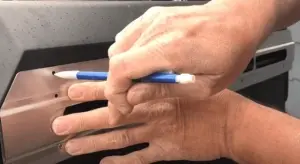
But, if you are not comfortable with a new one then you can modify your grate with skewers…
Instruction :
- Just take the flat skewer.
- Measure according to your charcoal width.
- Cut the skewer.
- Insert in the gaps of the grate..
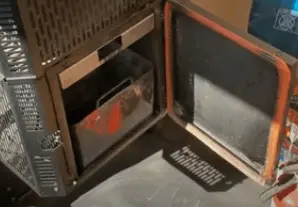
Mod 2: Masterbuilt 1050 firebox liner installation
Masterbuilt 1050 firebox modification is the same as it is Masterbuilt 560..
You can check for hopper liner or Firebox..
Steps:
- Remove the screws of the hopper cover.
- Disconnect the wire.
- Remove the screws of the upper hopper and keep aside.
- Take a hammer and hit gently on the firebox wall.
- Slide down half part of the new hopper liner.
- Next, lay a piece of lumber over the liner and hit it with a hammer there.
- Before assembling your upper hopper you can seal it with a gasket on the fire box lip.
- After installing the hopper liner, assemble all the parts back together..

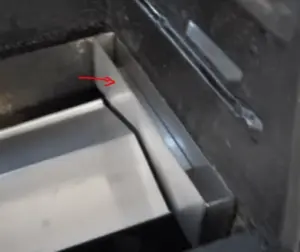
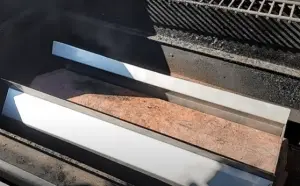
Mod 3: Masterbuilt 1050 water pan.
It’s very easy to insert a water pan between the manifold and the firebox..
You just buy and place it. If you want to make your own then you have to collect metal plates, welding machines etc. It will take time…
Here is a link to buy Water pan..
Incase you are looking for Masterbuilt 560 Mods? Check Here .
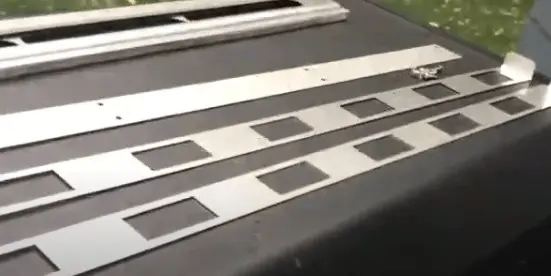
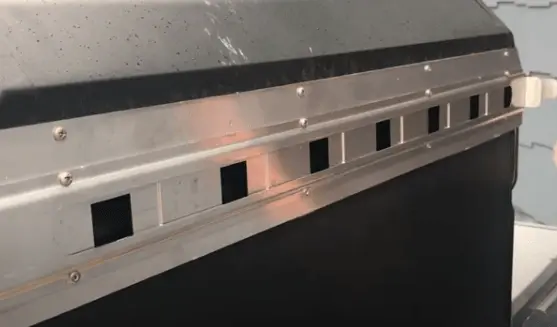
Mod 4: Masterbuilt 1050 vent mods
Steps:
- Keep ready two slides with kits and eight screws to mount.
- Hold the slide holder on the vent and mark with pencil in the two holes to drill.
- Next drill with screw on the marks.
- Then hold together two kits and place the kits hole on the drilled hole.
- Now fix it with a screw using a drill.
- Similarly, fix the screw in the rest of the holes as well.
- First insert the wide slide then narrow one behind it..
There are two links are available to buy Vent Slide or Vent Damper..
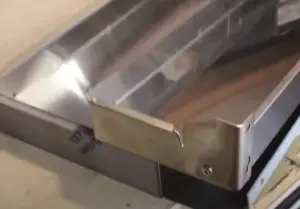
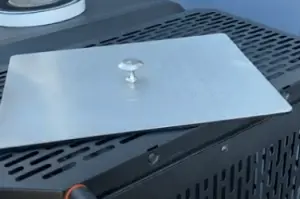
Mod 5: Masterbuilt 1050 manifold cover
You can also make your own by buying the goods.
Maybe you have to give time and a little effort.
But if you are not able to shop online then you have to take this step.
Easy to fix…
Just put the cover over the manifold…

Mod 6: Masterbuilt 1050 griddle shroud insert
If you want to add a griddle shroud in your smoker please check out the given link below..
It’s easy to insert and use..
Steps to follow :
- Remove your top two grates.
- Then remove your manifold cover.
- Now place griddle over the manifold.
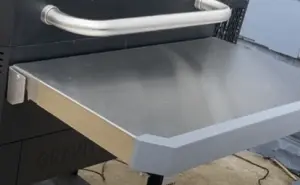
Mod 7: Masterbuilt 1050 front shelf
- Take the old shelf off and remove the screw.
- Remove the screws and take off the plastic guard from the attached shelf holder (old one).
- Get the new shelf lay on your workbench.
- Keep the old shelf over the new shelf as shown in the image.
- Pull the new one back and get the old one in there.
- Fix both shelf with 8 self-tappers screws.
- Attach the shelf below the handle or Masterbuilt name plate.
Incase you are looking for Masterbuilt 560 Mods? Check Here .
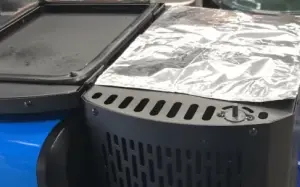
Mod 8: Masterbuilt 1050 hopper lid mods
You can apply lid shaped tin foils to prevent damage to the inside of the lid.
Or you can insert Hopper Cover Kit…
Mod 9: Replacing the Gasket.
# How to replace the gasket on the Masterbuilt Gravity Series?
Equipment:

- ✅ 【7/16 INCH THICK】7/16″ bulb, 7/8 OAW. 12 ft long 536F degree constant, retains shape
- ✅ 【FLEXIBLE】Soft design, hollow core extruded silicon smoker gasket
- ✅ 【EXCELLENT SMOKER SEAL】Perfect seal p-gasket, red color


- HIGH QUALITY ZINC PLATED STEEL: Made of 100% high quality durable steel with hard zinc plating, built to last years with…
- RUST RESISTANT: Zinc Plating provides an excellent corrosion resistant shell for a long lasting cost effective fastener
- CONVENIENCE: Hex Washer Head Sheet Metal Screws are known to be convenient and versatile. Great to have while working wi…

- HI TEMP RED SILICONE GASKET MAKER & SEALANT: Is an RTV (Room Temperature Vulcanized) Silicone gasketing material, design…
- COUNT ON US: For more than 40 years, our products have earned a loyal following from people who take pride in their work…
- EASY TO USE: Curing when the product is exposed to the moisture in air, it forms a tough, waterproof seal on most surfac…

- ID = .28″ OD = 1.0″ Thickness = .045″ Made of type 316 stainless steel
- Superior Resistance to any rust or corrosion in basically any environment
- An absolute must have for any salt water, pool or chemical applications
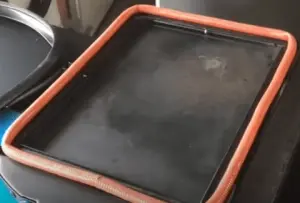
Steps to follow :
- Remove the top lid from the hopper.
- Take off the old seal out and also screw.
- Measure before fitting the gasket; otherwise, you will face difficulty.
- The shape of the lid is square, so you will need to drill on four side lips to hold the gasket.
- Double drill in one side where the ends will join.
- On the other three sides will be a single hole to put screws.
Also, use a given screw in their place. - Put the gasket all around the lip of the lid and at the same time attach it with a sheet metal screw to hold the gasket..
(Gasket has an extra portion to attach with screw) - Join both ends of the gasket with Hi-Temp RTV sealant.
- Use the tin foil to protect the gasket and underside of the lid.
Mod 10: How to fix a gasket on the firebox door?
Sometimes the gasket gets loose and comes out. You will have to take a little pain to fix or tighten it…
Steps to follow:
- Attach the gasket around the lids lip.
- Then put the silicone between the gasket and lip.
- Let the silicone dry for a couple of days.
- After drying you can use the lid.
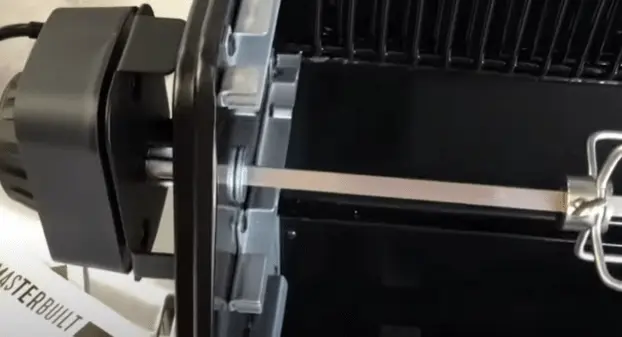
Mod 11: How to add Rotisserie?
Steps to follow:
- Inspect all parts which you have brought.
- Pre assemble- Attach the rotisserie rod in prongs or meat claws.
- Locate mounting holes
- Take off the rotisserie plug from the grill wall with the provided spanner tool.
- Mark in the opposite wall according to the height of the given hole so that the rod support can be added to it..
- Mount motor
- Fix the motor outside with a bracket.
- Hold the motor outside with your left hand and attach the adapter through that hole from inside.
- Then take the neck of the adapter and just tighten it up with a hand or spanner.
- Mount rod support
- Keep in mind that the adapter and rod support hole should be equal.
- Now aside we need to insert the rod support so attach the bracket opposite to the motor.
- Insert the rotisserie rod and turn it on
Mod 12: Stainless Steel Middle And Upper Grate Mods
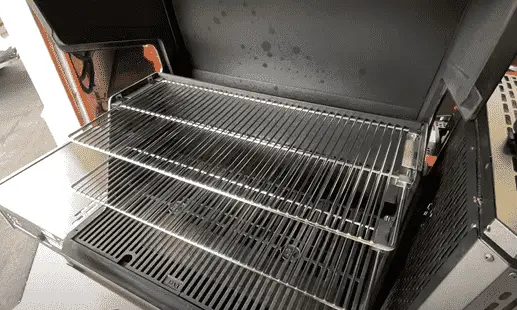
If you want to upgrade your Masterbuilt 1050 Gravity smoker with stainless steel grates then click here.
Recommended Reading:
– Check different types of Masterbuilt Gravity Series Grill & Smoker.
# Masterbuilt Gravity Series1050 Accessories.
- Cover
- Rotisserie Kit
- Meat Probe
- Extreme Heat Resistant BBQ Gloves
- Fish & Vegetable Smoking Mat
- Fire Starter
- Meat Thermometers
- Door Switch Replacement Part
- BBQ Gloves
- Masterbuilt 1050 Digital Grill, Smoker and Griddle Combo
- Masterbuilt Gravity Series Grill Outdoor Pizza Oven.
# Fan Troubleshooting for Masterbuilt 1050/560/800:
Recommended Reading:
– Masterbuilt gravity series 1050 mods reddit
FAQs
# Is the Masterbuilt 1050 worth it?
Yes, Masterbuilt 1050 is worth the price.
If you to get the performance of an old offset style smoker while quickly controlling the heat and temperature fast, then you are good to go..
# How do I turn off my Masterbuilt 1050?
To turn off Masterbuilt 1050.
Follow these are steps:
- Put off the power button.
- Insert two slides or dividers which cut off all airflow to the charcoal.
- Take off the power supply.
# How do I start my Masterbuilt 1050?
To start Masterbuilt 1050, do these:
- Pour charcoal into the hopper and burn it using a starter and lighter.
- Close the hopper lid and ash pan door.
- Take off two slides.
- Turn on temperature at 225 F.
# Is it possible to improve the flavor of the smoke by adding wood chips to the charcoal?
Yes, you can add chips to the charcoal chamber or to ash bucket to improve the flavor of the smoke..
# How long does a Masterbuilt 1050 hopper last?
The Masterbuilt 1050 Hopper runs for up to 8 hours depending on temperature.
This video will help you with Lss mods for Masterbuilt 1050 upgrades..
# Conclusion
Take your grilling to the next level with these crucial Masterbuilt 1050 modifications. With these enhancements, you may achieve exact temperature control, maximize fuel efficiency, and open up new cooking options.. Turn your Masterbuilt 1050 into a flavor and versatility powerhouse. With these game-changing improvements, you can upgrade your smoker and elevate your BBQ abilities. Don’t overlook these essential upgrades for the best grilling results..